Like many other boats, our leather helm covers had deteriorated. The deterioration happened relatively quickly. One day it was looking reasonably okay and a week later we were looking at leather pieces just falling off.
Something needed to be done as the state of the helms was hard to look at without twitching…
We naturally researched a leather replacement option but were quickly convinced that this was going to cut into the budget like a champion axeman.
We found that to get a leather wrap replacement, we would have to order it from overseas and each helm would cost around AU$500. Then we would have to sew it on.
So, alternatives were discussed and paracord came up as a reasonable solution at a cost of around AU$60 for both helms.
We also reasoned that the paracord would take about as long to apply as sowing the leather plus the fact that paracord would last longer.
Paracord Styles and Colours
After the decision to make our new helm covers from paracord, we needed to settle on a style that both looked good and was relatively simple to apply. There is an insane amount of knots you can do with paracord and there is no better place to look at these than the Paracord Guild.
We narrowed it down to the following but ended up with the 3 strand zigzag ringbolt hitch.


If you after more hitches, knots or anything to do with paracord, just visit the Paracord Guild where you can watch hundreds of “how-to” videos.
In terms of colours and colour combinations, it is best to see what is available. There is a wide range of paracord colours which we perused on eBay. We found a shop that sold a reasonable variety of colours in 100-meter lengths. Delivery was about 3 week but the product arrived as described. Without endorsing this shop, it is a good starting point to start your hunt for paracord. eBay Shop Link.
Ordering the paracord
In order to practice and work out how many meters of paracord we needed, we bought some paracord from Bunnings. We used this to practice the various patterns and experiment on our helms. We were able to calculate how much paracord we would need by:
- Wrapping the helm with the hitching weave using the 4mm paracord.
- See what the coverage was on our helm using 1-meter lengths of paracord.
- Then we measured the circumference of our helm to get the full length required to do the whole helm using the old “multiplying the diameter by 3.14 plus adding on a fudge factor of 10%.
- This revealed that with a 3 strand zigzag ringbolt hitch that we needed 33 metres of each paracord for each helm based on the diameter of 940mm x Pi.
We ordered a light grey, dark grey and gold 4mm paracord for our helms to compliment the colour of our boat and canvases.
We tried one pattern which is called a French spiral hitch which looks great, but when we actually tried to do it on our helm we found out that the clearance around our helms meant we needed a much flatter design. Plus a spiral pattern around a helm is hard to do. So it was out.
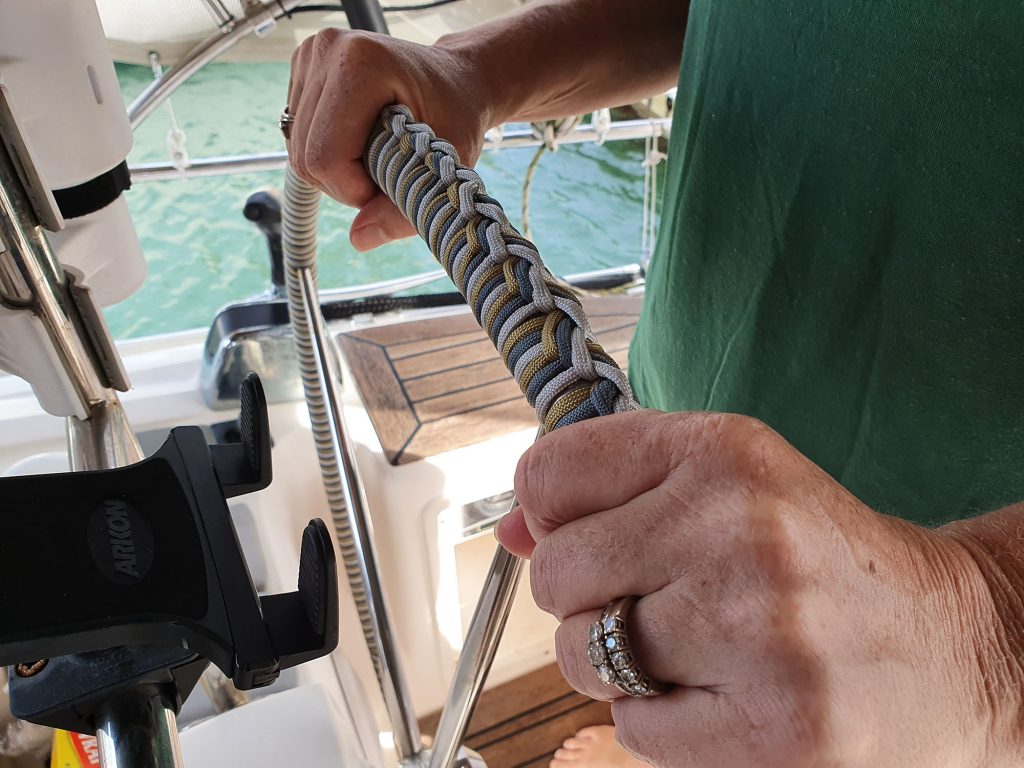
We then practised the zig-zag hitch. This is a flatter design where three cords hitched one way and then the other. It’s quite easy to do. This is the link to the zig-zag video.
Preparing to hitch
The paracord came in a bundle, and we decided to put it on a handle so that the hitching would be easier to manage. Others advised us to put the paracord in a little bag but found the old fishing line on a stick a simpler solution. In any case, do not try this with large 100-meter bundles as supplied; there will be tangle tears!


We removed the helms altogether so we could take them below and do this in comfort. It was also better on our backs.
During the hitching
First, you need to set up your space. As you have to hitch from one side to the other, you need a space that allows you to place your paracord reels on both sides of your helm and in easy reach with your helm in the middle.
With this particular pattern, the paracord on your right will be the predominant colour, so choose your favourite colour.
After each section of hitching (ie three strands), make sure you tighten your hitches and check that it is sitting correctly and neatly both front and back. Sometimes the cords cross over, so you have to continually check your pattern. Keep your reels tight and fairly short.
It took me about three hours per helm, and I took a break every hour at least to stretch.
We found that in the video, it didn’t talk about what to do when the two ends join back up. So we joined the weaves together, then used a crochet hook to pull the end through, then burn and superglue to secure and finally, we used a heat rope cutter to seal the ends. So the join looked like this.
We also found the raised bit slipped around the wheel a bit, so we used superglue to help secure it in place. We did experiment with several types of glues and found that your normal superglue was the way to go. We dotted it between the paracord on the inside of the helm so it adhered to the metal itself.
The result
This is the result of our efforts.
In terms of how this feels on your hands, we have now sailed with it several times and have found it to be comfy on our hands. Our raised pattern is on the top, which seems to fit in the hand well. Whilst our helms don’t generally get wet as we have a great dodger and bimini, we did purposely make it wet with seawater to see how it reacted. It did not shrink or move.
We also have a friend who used a six cord weave about five years ago and his helm looks like new. He has had no issues with wear and tear at all. So it seems to be long-wearing.
If you have any experiences you would like to share about paracord helm coverings then do so below in the comment box. Or you may simply send us a photo of your own paracord covered helm…
How long ago was this post? How is it holding up? Has the rope held its colour? Cheers!
The cord has been on there for about one year now and looks like it was put on yesterday. We do have the wheels under a bimini though so they only get the sun in the morning and afternoon. We are very happy with this approach. It is relatively soft on the hands but still provides very good grip.